Gothic acrylic nails are a cool way to show off your dark and spooky style. They use bold colors, sharp shapes, and fun designs to make your hands look amazing.
Find Gothic Acrylic Nails on Amazon #ad
Anyone can wear them, and they are great for parties, photos, or everyday style.
Different Gothic Nail Styles
There are many styles you can choose from:
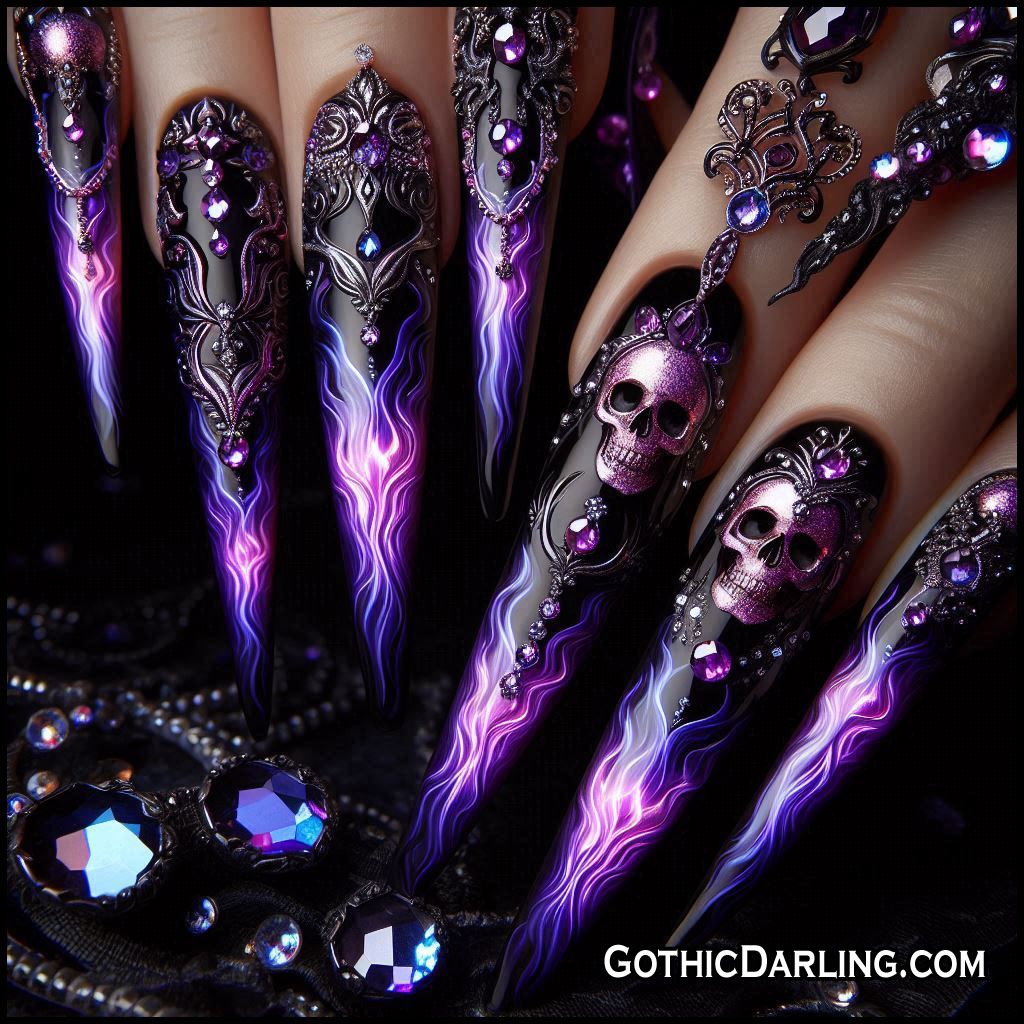
1. Long Pointed Nails (Stiletto Nails)
These nails are sharp and dramatic. They look like witch claws and are perfect for a spooky look.
2. Coffin or Ballerina Nails
These nails are long with a flat tip. They look fancy and gothic at the same time. Many people love this shape because it looks strong and stylish.
3. Short Gothic Nails
You can still be gothic without long nails. Short black or purple nails with tiny designs look just as cool.
Popular Gothic Colors
Gothic nails use dark, rich colors that look bold and mysterious.
- Black – the most classic gothic color
- Purple – deep or bright purple for a magical vibe
- Red – dark red looks like vampires and gothic romance
- Silver – shiny metallic silver adds sparkle
- Dark Blue – almost like a midnight sky
- Maroon or Wine – rich, fancy, and dramatic
You can mix these colors or add glitter to make them even prettier.
Fun Gothic Nail Designs
Here are some designs people love:
- Skulls
- Bats
- Spiderwebs
- Moons and stars
- Roses
- Chains or studs
- Flames
- Glitter tips
You can pick one design or mix a few together for your perfect gothic look.
How to Put On Acrylic Nails
Putting on acrylic nails takes patience, but it is easy if you follow the steps.
Step 1: Get Your Supplies
You will need:
- Acrylic nail tips
- Nail glue
- Nail file
- Acrylic powder and liquid
- Small brush
- Nail polish or gel polish
Get Gothic Acrylic Nails & Supplies on Amazon #ad
Step 2: Prepare Your Nails
Wash your hands. Then gently file the tops of your natural nails to make them a little rough. This helps the acrylic stick better.
Step 3: Glue on the Tips
Find the nail tips that fit each finger. Put a small amount of glue on the tip and press it onto your nail. Hold it for a few seconds.
Step 4: Add the Acrylic
Dip your brush into the liquid, then into the acrylic powder. It will form a small bead. Spread the bead over your nail until it is smooth.
Step 5: Shape and File
After the acrylic dries, file the nails into your favorite shape—stiletto, coffin, square, or round.
Step 6: Paint and Decorate
Now comes the fun part! Paint your nails with black, purple, red, or any gothic color you want. Add designs, crystals, or glitter to finish the look.
Why Gothic Acrylic Nails Are So Popular
People love gothic acrylic nails because they are bold and full of personality. They help you show your style, whether you love spooky things, dark colors, or magical themes. They also look great in photos and make any outfit stand out.
In this guide, you learned about different nail shapes like stiletto, coffin, and short gothic nails. You also saw popular gothic colors such as black, purple, red, and silver. The article explains easy steps for putting on acrylic nails at home, from gluing the tips to painting and decorating them. With cool designs like skulls, bats, spiderwebs, and moons, anyone can create their own gothic look. Gothic acrylic nails are popular because they help you express your personality and make your hands look amazing.