Welcome to Gothic Fashion and Culture from New Orleans. Some links on this site are affiliate links, which means I may earn a small commission if you make a purchase through them—at no extra cost to you. I only share products I genuinely love or use myself. As an Amazon Associate I earn from qualifying purchases.
Many adults are still kids at heart, and the joy of building and creating doesn’t disappear with age. Because of this, building block sets today are designed for both kids and adults, offering creative projects that can be fun, relaxing, and even collectible.
These sets allow people to build detailed scenes, display them proudly, and reconnect with the playful creativity many remember from childhood.
Modern building block sets come in a wide variety of franchise themes and unique styles that appeal to different interests. Some sets are inspired by popular movies, games, or fantasy worlds, while others focus on darker aesthetics like gothic castles, mysterious landscapes, or spooky designs. Builders can find sets featuring skulls, dark towers, haunted buildings, and other gothic elements that give a dramatic and artistic look to their creations.
These gothic-themed sets are especially popular with older builders who enjoy the combination of creativity and bold design. With black and dark-colored pieces, detailed decorations, and eerie motifs, these sets offer a different style from traditional bright children’s toys. Whether someone is building a spooky castle, a skull-covered structure, or a gothic display piece, building block sets continue to evolve to match the interests of builders of all ages. 🧱🖤
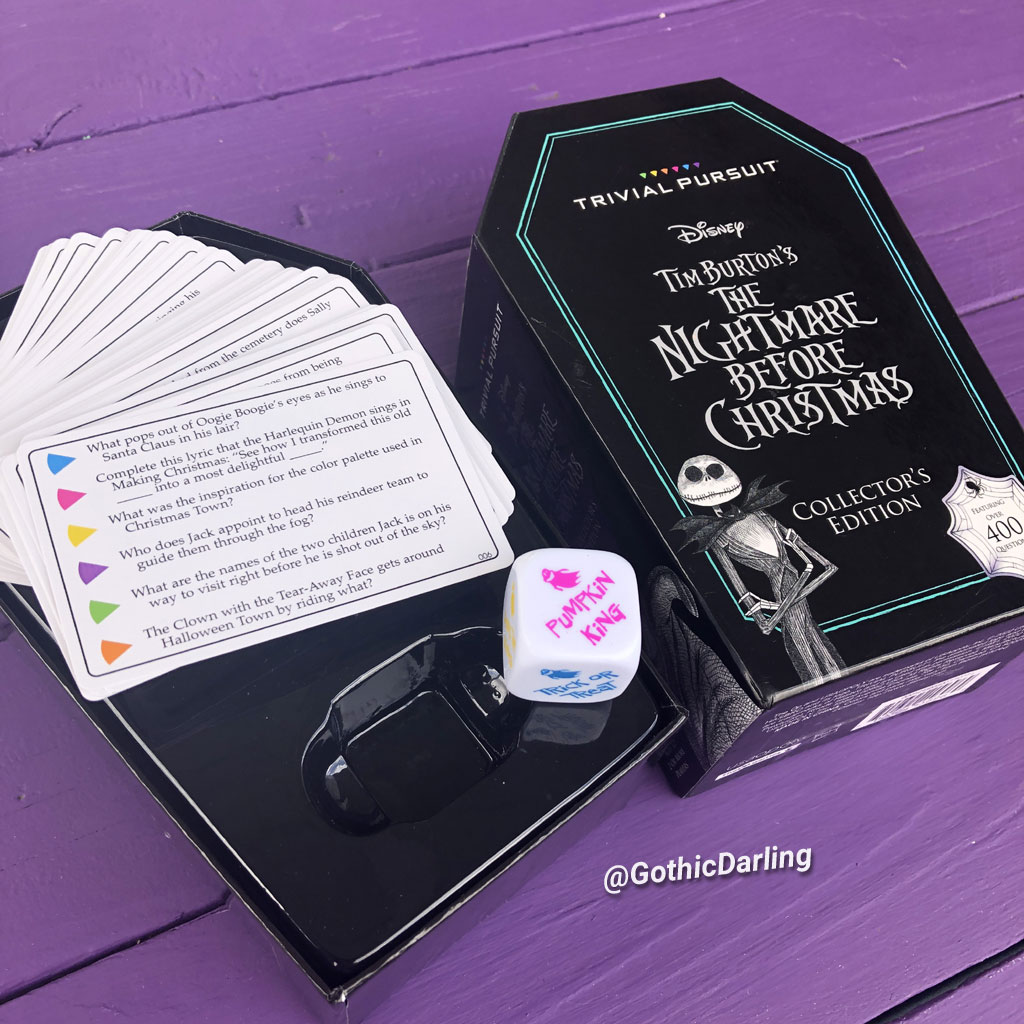
A Family Goth Board Game Night can be a fun and spooky way to spend time together, especially when everyone gathers to play games inspired by The Nightmare Before Christmas.
Fans of the dark yet whimsical world of Jack Skellington can challenge each other with games like The Nightmare Before Christmas Trivial Pursuit and the Nightmare Before Christmas Collector’s Edition. These themed games bring the eerie charm of Halloween Town right to the table, letting players test their knowledge of the beloved film while enjoying laughs, friendly competition, and a cozy gothic atmosphere.
During the night, family members can take turns answering trivia about characters, songs, and memorable moments from the movie while surrounded by Halloween-themed decorations, dim lighting, and maybe even a spooky playlist. The collector’s edition games make the experience even more special for dedicated fans, turning a simple game night into a celebration of gothic style and Disney nostalgia. Whether you’re a trivia expert or just love the movie, a Nightmare Before Christmas game night is the perfect way for families to bond over their shared love of spooky fun. 🎃🖤
A Gothic Valentine decorating guide by Monique Lula, New Orleans
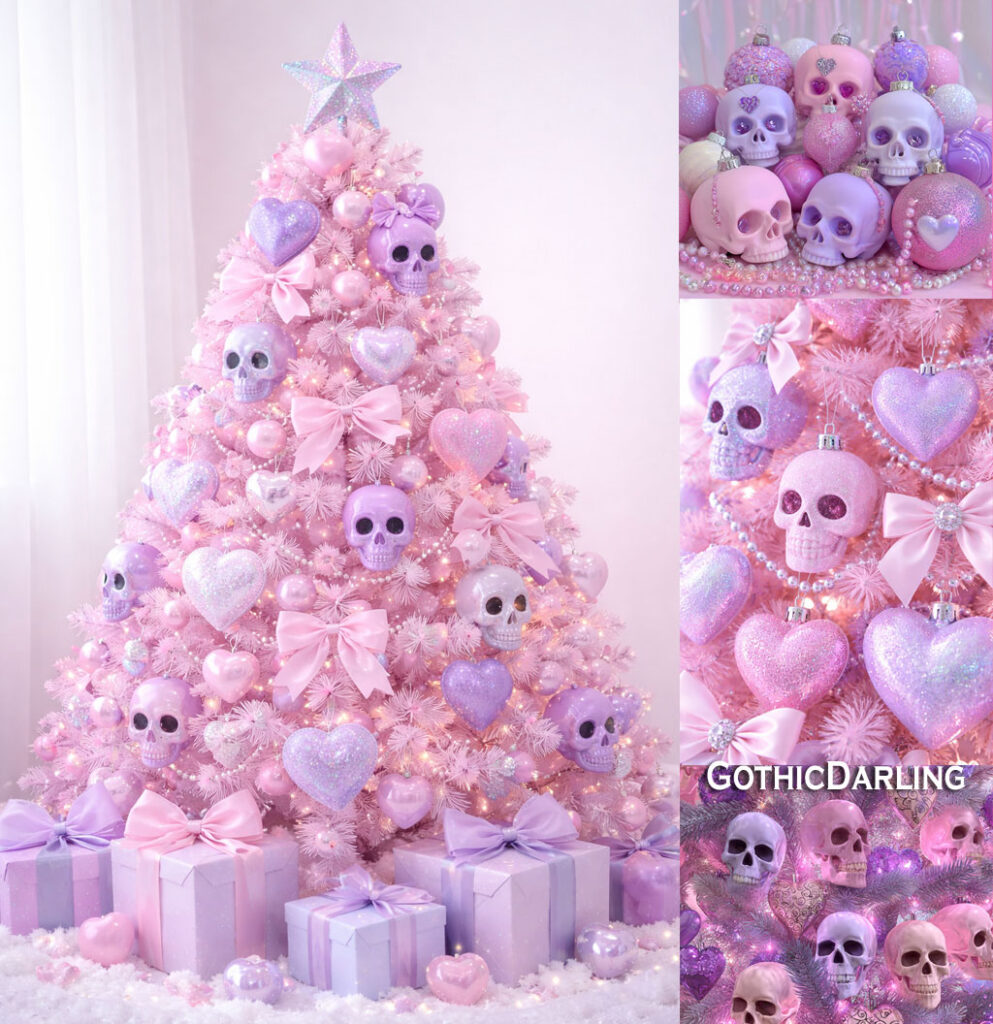
Valentine’s Day doesn’t have to be all pink glitter and roses—it can be spooky, romantic, and delightfully dark. A Skull & Hearts Valentine tree blends gothic charm, Halloween attitude, and Christmas-style layering into one dramatic seasonal statement. Whether you lean bold and black or soft and pastel, this guide walks you through creating a show-stopping Valloween Valentine tree that feels intentional, magical, and full of love.
Example Valloween Valentine’s Christmas Tree in Pastel Skulls and Hearts
The Tree
Start with the tree itself. A black artificial tree creates the strongest gothic base, but white trees work beautifully for pastel or romantic skull themes. Slim trees feel elegant and moody, while fuller trees give you more space to layer skulls, hearts, and ribbons. For a Pastel Skull Tree, a white or blush-tinted tree sets the stage for soft pinks, lavender, and pearlescent accents while still allowing skull details to stand out without feeling heavy.
Lighting sets the mood. Warm white lights give a candle-lit romance, while pink, red, or purple lights add Valentine drama. For gothic flair, mix in flickering LED candles or dimmable fairy lights. On pastel skull trees, soft pink or champagne lights keep the look dreamy rather than spooky. Weave lights deep into the branches first so they glow from within instead of sitting on the surface.
This is where the personality shines. Mix skull ornaments, heart shapes, bows, roses, and beads just like you would on a Christmas tree. Use a blend of textures—matte skulls, glossy hearts, velvet bows, and metallic accents—to avoid a flat look. For a Pastel Skull Tree example, choose baby-pink skulls, lavender hearts, pearl strands, and soft black accents for contrast. Let skulls and hearts alternate visually so the tree feels balanced, not cluttered.
The topper should feel intentional and symbolic. A heart with thorn details, a skull crown, a gothic bow, or even crossed roses make striking toppers. For a softer Valentine look, oversized bows in velvet or satin work beautifully. On pastel skull trees, a glitter heart, angelic skull, or layered ribbon topper keeps the tree romantic while staying true to the gothic theme.
Finish the look from the ground up. Faux fur in black, blush, or white adds luxury and softness. Lace, tulle, or velvet skirts bring Victorian romance, while printed skull or heart fabrics lean playful and bold. For pastel gothic styles, a fluffy white or pale pink skirt helps lighten the overall look and frames the tree like a display piece rather than a holiday leftover.
Decorate this tree the same way you would a Christmas tree: lights first, large elements next, then fill in with smaller details. Step back often to check balance and spacing. Use repetition—similar skulls, repeated heart shapes, or consistent ribbon colors—to make the theme feel curated. Most importantly, let the tree tell a story: gothic love, spooky romance, and Valentine magic with a twist.
A Skull & Hearts Valentine tree is more than décor—it’s a mood, a statement, and a celebration of love in all its beautifully strange forms. Whether bold and dark or soft and pastel, it’s a perfect centerpiece for a Gothic Valentine season, styled with heart and imagination in New Orleans spirit.
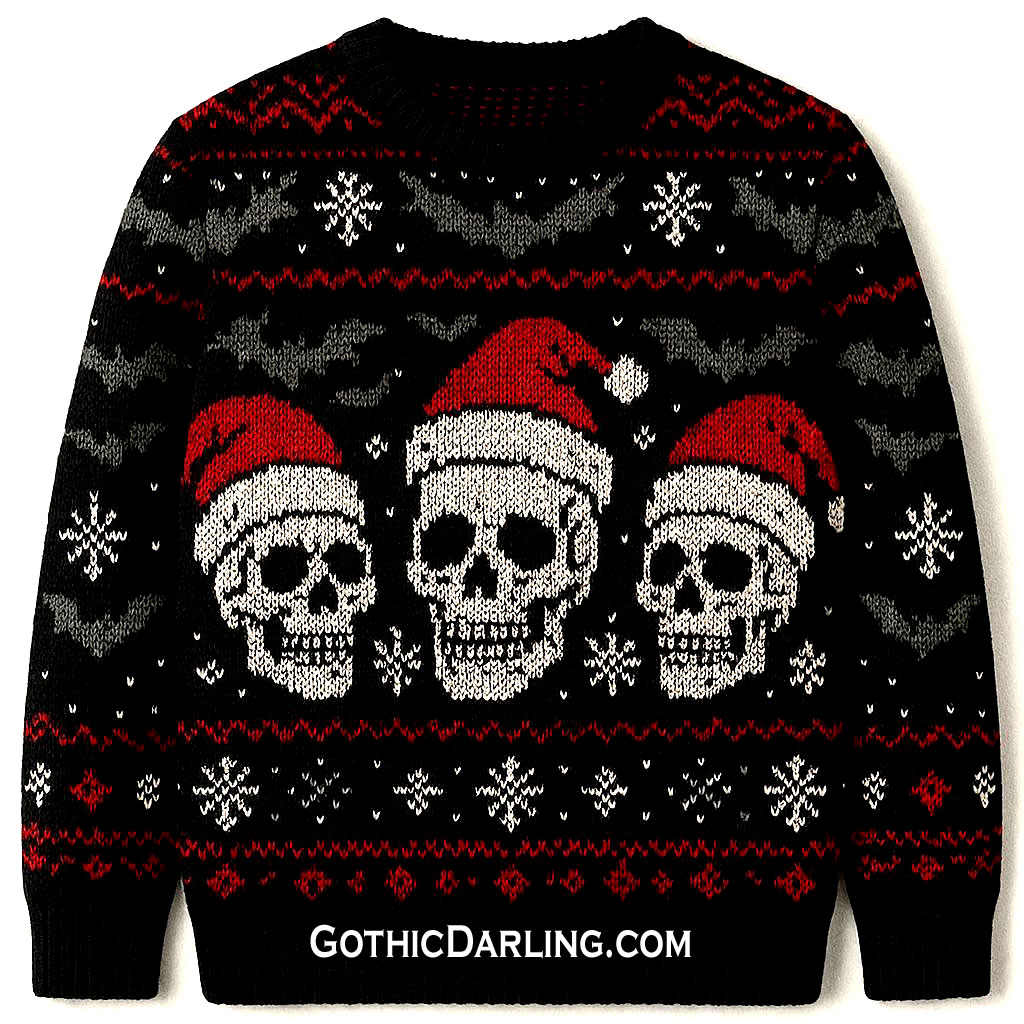
Gothic Christmas sweaters are proof that the holidays don’t have to be all candy canes, elves, and neon cheer—there’s plenty of room for some Goth Fashion. These sweaters take the classic “ugly Christmas sweater” tradition and transform it into something beautifully haunting.
Think black knit fabric adorned with skulls, ravens, bats, skeleton Santas, glowing gothic motifs, and deep jewel-tone accents. Instead of traditional red and green, you might find wine-red velvet threads, ultraviolet purple highlights, metallic silver bones, or even strands of LED lights weaving through knitted skulls. They’re cozy, moody, and unapologetically alternative.
What makes Gothic Christmas sweaters so special is the way they blend comfort with artistic edge. Each design feels like a tiny piece of dark holiday storytelling—a winter night in a haunted mansion, a snowstorm drifting through a graveyard, or a skeletal Santa delivering gifts under a crescent moon. Many Gothic sweaters also play with texture and depth, using chunky knits, embroidered details, faux fur trims, or glow-in-the-dark elements for that extra touch of magic. They stand out at holiday parties, family gatherings, or even quiet evenings by the fire, offering a stylish way to celebrate the season without abandoning your inner ghoul.
For creators, collectors, and lovers of spooky fashion, Gothic Christmas sweaters have become a yearly tradition. Each season brings new variations: knitted skull garlands, Victorian lace overlays, black-and-white fair isle patterns with little bones and bats, or sweaters depicting Krampus, Jack Skellington–style snowmen, and Gothic reindeer silhouettes. Some designs even incorporate strand-like Christmas lights, giving the sweater a glowing, enchanted “nightmare before Christmas” vibe. Whether you wear them for comfort, for fun, or as part of your Gothic holiday aesthetic, these sweaters prove that you can celebrate Christmas your way—dark, whimsical, festive, and beautifully unique.
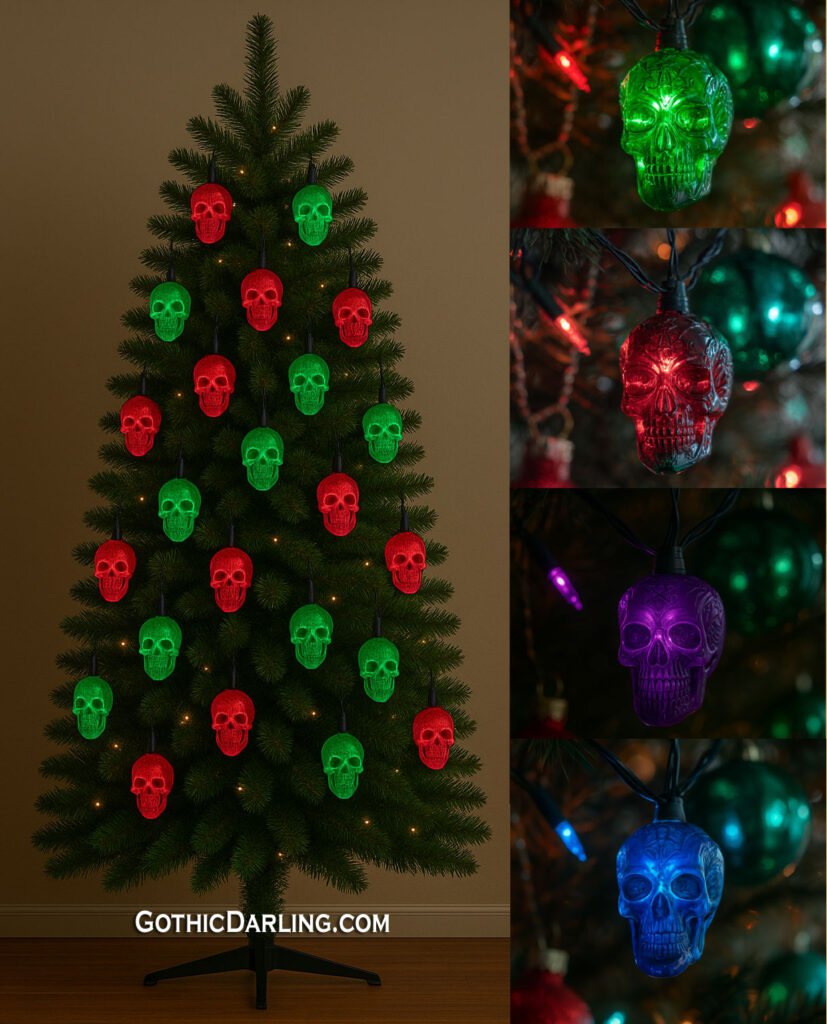
Skull-shaped Christmas lights are the perfect way to bring a delightfully dark twist to the holiday season. Instead of traditional bulbs, these eerie little silhouettes cast a soft glow that feels both festive and rebellious—like Christmas slipped through a haunted mansion on its way to your tree.
Whether they light up in classic bone-white, icy blue, ultraviolet purple, or traditional red and green, skull lights instantly transform any space into a Gothic winter wonderland. They’re proof that you don’t need to trade your spooky aesthetic for bright Santa reds to celebrate the season in style.
What makes skull Christmas lights so magical is how they blend the cozy warmth of the holidays with the moody beauty of the macabre. Imagine draping a strand across a black Christmas tree, weaving them through garland on a mantel, or hanging them around a mirror to illuminate your home with a ghostly glow. Some even light up in mesmerizing neon colors, perfect for anyone who loves that ultraviolet, glow-in-the-dark pop. They invite guests to look twice, smile, and embrace a holiday vibe that’s beautifully unconventional.
For many Gothic creators and collectors, skull lights aren’t just decorations—they’re part of a tradition. Each year, new variations appear: hand-sculpted skull covers, resin miniatures filled with glitter, LED versions with flickering candlelight effects, and even extra-cute chubby skull shapes for softer Gothic aesthetics. They pair beautifully with skull ornaments, black tinsel, coffin stockings, and other dark décor, helping you craft a holiday display that feels uniquely you. Instead of hiding your spooky side for the season, skull lights let it shine—literally.
Skull-themed Christmas stockings in deep black bring a daring twist to traditional holiday décor, perfect for anyone who loves blending festive cheer with Gothic charm.
Instead of bright reds and greens, these stockings embrace a moodier palette, creating a stunning contrast against twinkling lights and candlelit mantels.
The skull motifs add a touch of mystery and edge, turning your fireplace display into a darkly enchanting scene that feels straight out of a Gothic winter fairytale.
Hanging these stockings instantly transforms your holiday space. The bold black fabric makes the skull designs stand out beautifully—whether embroidered, printed, or textured—giving each stocking a personality of its own. They pair effortlessly with black Christmas trees, silver garlands, raven ornaments, or any moody décor you love. The result is a holiday aesthetic that breaks all the rules in the best way: cozy, dramatic, and undeniably unique.
Skull-themed stockings are perfect for Gothic homes, alternative holiday lovers, or anyone who prefers their Christmas with a hint of spookiness. They make wonderful conversation pieces and add a stylishly dark flourish to gift-giving traditions. Whether you’re decorating for yourself or surprising a fellow goth-at-heart, these stockings bring a beautifully haunting vibe to the season—proving that Christmas magic shines just as brightly in shades of black.
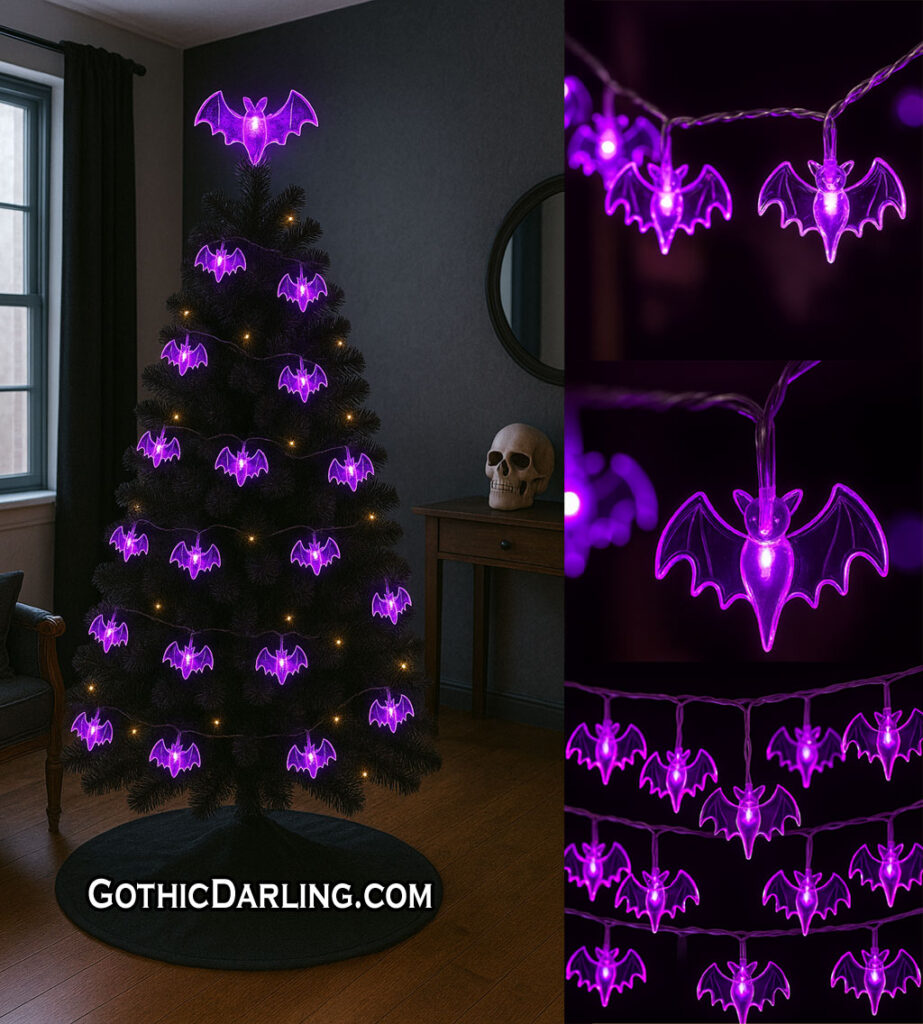
The moment those glowing little bats flicker to life, the whole tree takes on a mystical, Gothic charm—like a shadowy winter forest where enchantment hides in every branch.
The contrast of bright, eerie lights against the deep black tree creates a captivating atmosphere, perfect for anyone who adores spooky elegance and wants their holiday décor to stand out in the most enchanting way.
As the bats illuminate the room, they bring a softly haunting glow that feels both festive and otherworldly. Instead of traditional twinkling bulbs, these winged silhouettes swoop across your tree in shimmering patterns of light, setting the stage for a beautifully unconventional Christmas. Each bat seems to dance in the glow, adding texture, personality, and just the right amount of Gothic drama to your holiday space.
A black Christmas tree already turns heads, but adding light-up bat lights transforms it into a full statement piece—a celebration of spooky season meeting holiday cheer. It’s perfect for Gothic homes, Halloween lovers, or anyone who wants to mix mistletoe with moonlight. Whether you display it in your living room, office, or bedroom, your glowing bat-lit tree will bring mysterious charm, cozy darkness, and unforgettable Gothic Christmas vibes all season long.
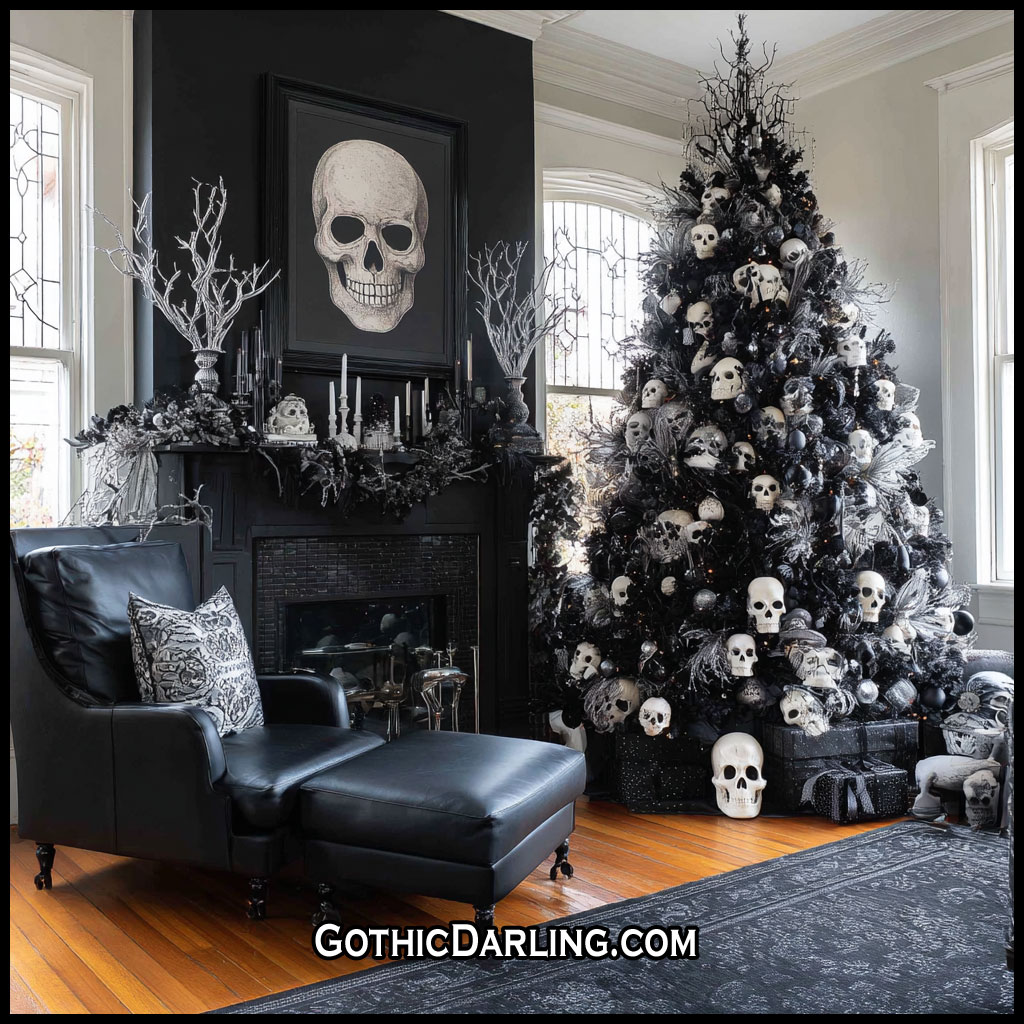
Decorating a skull-themed Christmas tree is a fun way to mix spooky style with holiday cheer. You can make your tree look cool, gothic, and still feel festive.
Here’s how to create the perfect skull Christmas tree, step by step!
1. The Tree
Start by choosing the right tree. A black tree looks amazing for a skull theme, because it makes the decorations pop. But you can also use a white, silver, or green tree if that’s what you have. Fluff the branches so the tree looks full and tall. This gives you more room for your skull ornaments and lights. If you want extra drama, lightly spray fake snow on the ends of the branches for a frosty, spooky look.
Now it’s time to add your skull ornaments! You can use small skulls, glitter skulls, hand-painted skulls, or even glow-in-the-dark ones. Try to use different sizes so your tree looks interesting. Place the bigger ornaments deeper inside the tree to add depth, and put the smaller ones on the outside where they show. You can mix in black ornaments, silver balls, and gothic shapes like bats or bones to match the theme.
Lights make your skull tree come alive. White lights look clean and bright, but purple or red lights make the tree look spooky and magical. Wrap the lights around the tree from top to bottom, keeping them even. If you want extra glow, add some LED skull string lights or fairy lights. Make sure the lights go deep into the branches so your tree shines from the inside out.
The tree topper is one of the most important parts of your skull-themed Christmas tree. Instead of a star or angel, choose a big skull topper! You can use a glitter skull, a crowned skull, a skull with bat wings, or even a spooky skeleton head that lights up. Place it carefully on the top branch and make sure it is straight. This will be the main eye-catching piece of your whole tree.
The tree skirt finishes the whole look and brings the theme together. A skull-themed tree skirt can be black with white skulls, white with black skulls, or decorated with bones, bats, or spiderweb designs. This is where presents will sit, so you want it to look cool! You can even make your own by sewing fabric or attaching skull patches to a plain black skirt. The tree skirt helps hide the stand and gives your tree a clean, complete, spooky style.
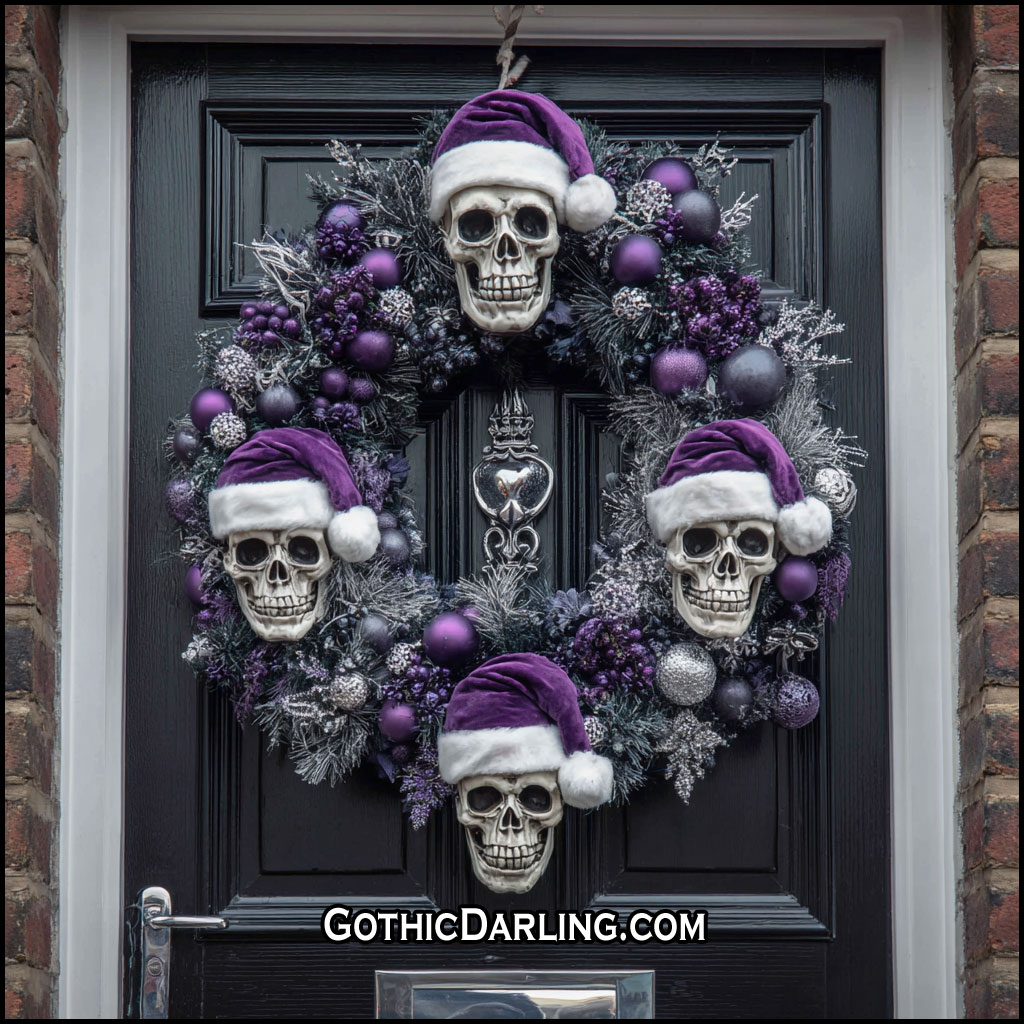
If your style leans more toward the macabre, bold, and beautifully gothic, a skull-themed Christmas wreath is the perfect way to welcome guests into your home. Whether you prefer black roses, glittery skulls, or shimmering red accents, this wreath is a simple DIY project that transforms your front door into a spooky winter masterpiece.
What You’ll Need
Here are the essential materials to build your dark and dazzling skull Christmas wreath:
1. Wreath Base
Black or evergreen wreath (grapevine, wire, or faux pine)
Choose black if you want a fully gothic look
Choose evergreen if you want a spooky spin on a classic holiday wreath
Step-By-Step: How To Build Your Skull Christmas Wreath
Step 1: Prepare Your Wreath Base
Fluff, shape, or spread out the branches (if using pine). If using grapevine, check for loose pieces and trim as needed. This gives you a clean base to work with.
Step 2: Place Your Statement Skulls
Start with the largest skulls first so you can build around them.
Add one large skull to the center or bottom-right corner for dramatic effect.
Secure with floral wire or hot glue.
Step 3: Add Your Roses & Florals
Insert black and red roses around the wreath.
Keep things visually balanced.
Mix in branches or berries for texture.
Step 4: Fill in With Ornaments
Add ornaments of various sizes.
Stick to your chosen color palette (black/red/white/silver).
Use smaller ornaments to fill empty spaces.
Step 5: Add Lights (If Using)
Wrap your LED lights around the wreath, weaving them between skulls and florals.
Hide the battery pack behind the wreath or under the bow.
Step 6: Attach Your Gothic Bow
Create a dramatic bow and attach it to the top or bottom. Velvet, satin, or lace all add a romantic gothic touch.
Step 7: Final Touches
Add mini skulls in open spots.
Tuck in glitter branches for sparkle.
Adjust everything until it feels balanced and bold.
Where to Display Your Skull Wreath
This wreath looks amazing on:
Your front door
A gothic home bar
Your living room wall
A fireplace mantle
Above a gothic bookcase or altar
It creates the perfect dark holiday vibe for anyone who loves a little spooky magic in December.
Final Thoughts
Creating your own skull-themed Christmas wreath is a fun way to combine holiday cheer with gothic style. It’s bold, beautiful, and totally unique — just like you. Whether you go full black magic or add pops of classic Christmas red, your wreath will become a show-stopping piece of décor you’ll love year after year.
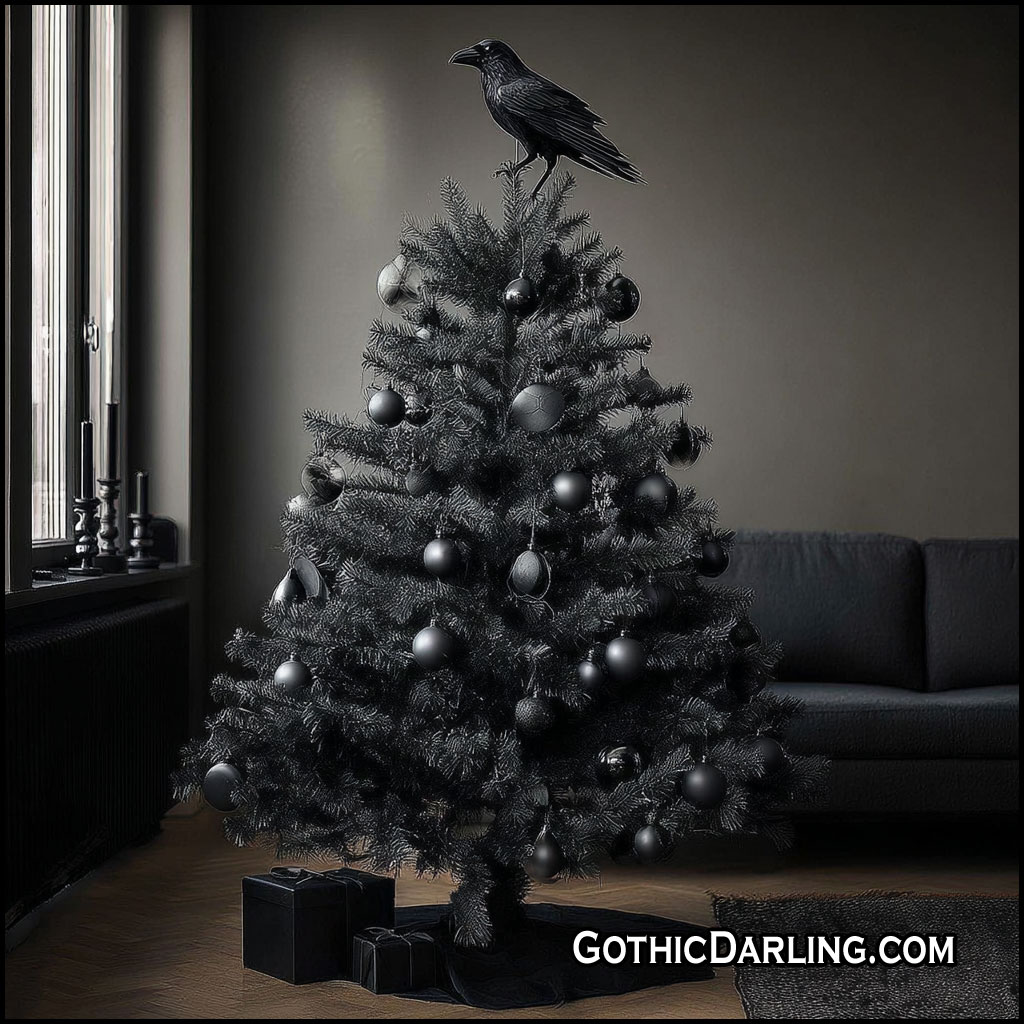
I have a few Christmas trees in a variety of colors, but my favorite is my Black Christmas Tree. You can decorate it so many different ways, and this year I wanted to go for an all-black design with a Black Raven themed Christmas Tree.
Follow this guide on how to decorate your own.
A raven-themed Christmas tree is spooky, elegant, and magical — perfect for anyone who loves dark, mysterious winter vibes! Here’s how to decorate your own step by step.
🎄 The Black Tree
Start with a black artificial Christmas tree. You can find them in shiny, matte, or glitter styles. Fluff out the branches so it looks full. The black color makes everything else — like lights and ornaments — really stand out. A tall, full tree looks dramatic and gothic!
Use the multi-color LED lights is my personal choice, you can change the colors and it looks cool to have a variety. But you can also go with a solid color like blue, or purple… Wrap the lights from the bottom up, weaving them deep into the branches. Purple lights give it a mysterious mood, and amber ones look warm like candlelight. You can even add flickering LED candles for an extra spooky touch. There are tons of different lights available so go with whatever you vibe with.
Black Christmas tree lights are specific and are black so they don’t show up in the branches.
Decorate with shiny black, matte black, and glittery black ornaments like black snowflakes. Add Raven feathers, tiny skulls, or black roses also look amazing. Mix it up to make it more interesting.
This is the most important part! Find a large, elegant black raven or crow to perch on top of your tree. You can buy one at a craft store or make one from feathers and wire. Position it so it looks like it’s watching over your gothic winter wonderland. You can even add a small Santa hat for a fun twist!
Finish your look with a black velvet tree skirt. This covers the base and ties the whole theme together. You can decorate it with fake ravens, skull ornaments, or twinkling fairy lights around the edge. It keeps the dark theme stylish and cozy at the same time. These come in a variety of styles with designs and patterns on them or solid black.
✨ Final Thoughts: The black raven tree is one of a my favorites and even if you choose to add a little color, the solid black design is awesome with red or purple lights. Thanks for reading, stay tuned for more guides.!