Welcome to Gothic Fashion and Culture from New Orleans. Some links on this site are affiliate links, which means I may earn a small commission if you make a purchase through them—at no extra cost to you. I only share products I genuinely love or use myself. As an Amazon Associate I earn from qualifying purchases.
A black bat-shaped cutting board is more than just a kitchen tool—it’s a statement piece that transforms your gothic kitchen into a space of dark elegance and personality. With its sweeping wings and dramatic silhouette, it evokes the mystique of moonlit nights and shadowy castles, making even the simplest meal prep feel like a ritual. Whether displayed against a backsplash or laid out on your countertop, it instantly becomes a focal point that captures the essence of gothic charm.
Function meets aesthetic in the most delightful way when you use your bat cutting board for everyday tasks. Chopping herbs, slicing fruit, or preparing midnight snacks takes on a theatrical flair, as if you’re crafting potions in a modern-day witch’s lair. The deep black surface contrasts beautifully with vibrant ingredients—crimson tomatoes, pale garlic, or fresh green basil—creating a visually striking scene that feels straight out of a gothic dream.
A bat-shaped cutting board also symbolizes how practical items can embrace your unique style. It’s a reminder that gothic living isn’t confined to fashion or decor—it extends into the heart of the home. By incorporating pieces like this into your kitchen, you create an environment that is both functional and enchantingly dark, where every detail reflects your love for the mysterious and macabre.
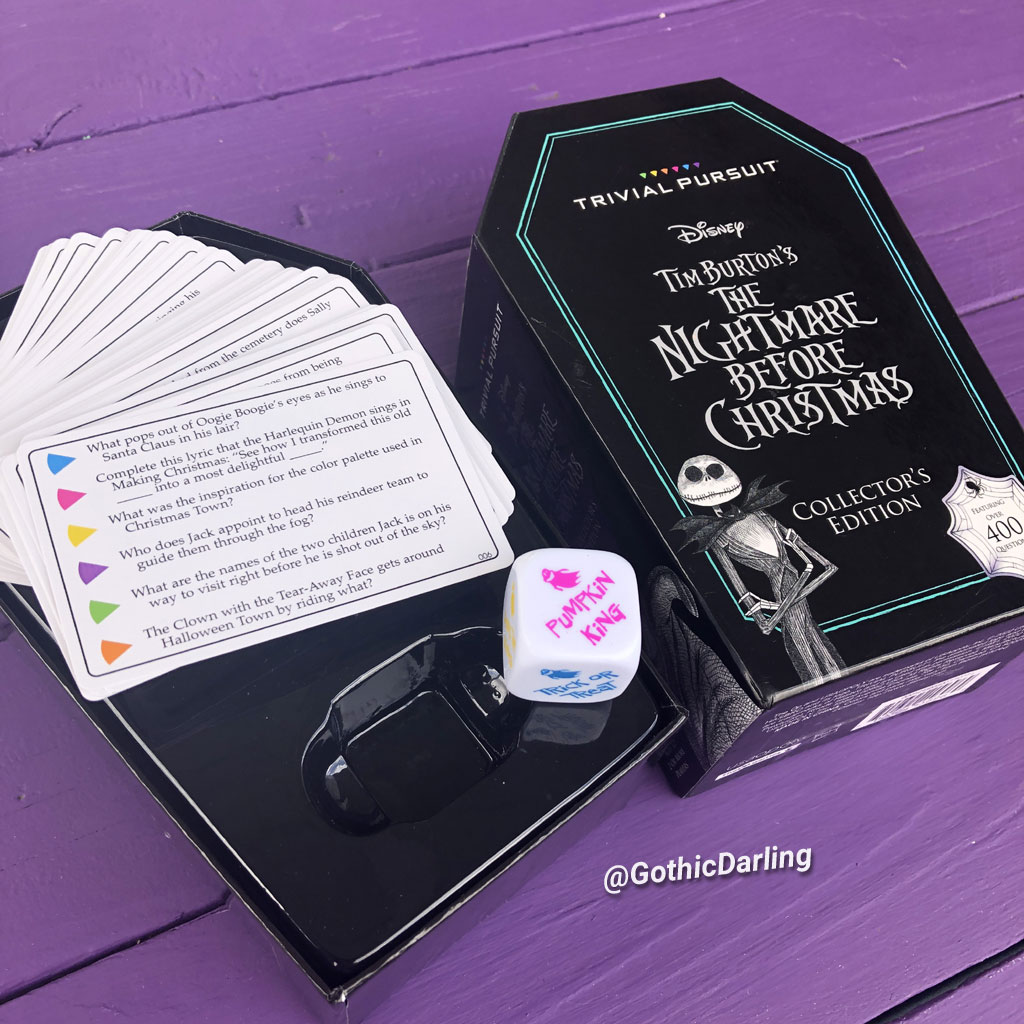
A Family Goth Board Game Night can be a fun and spooky way to spend time together, especially when everyone gathers to play games inspired by The Nightmare Before Christmas.
Fans of the dark yet whimsical world of Jack Skellington can challenge each other with games like The Nightmare Before Christmas Trivial Pursuit and the Nightmare Before Christmas Collector’s Edition. These themed games bring the eerie charm of Halloween Town right to the table, letting players test their knowledge of the beloved film while enjoying laughs, friendly competition, and a cozy gothic atmosphere.
During the night, family members can take turns answering trivia about characters, songs, and memorable moments from the movie while surrounded by Halloween-themed decorations, dim lighting, and maybe even a spooky playlist. The collector’s edition games make the experience even more special for dedicated fans, turning a simple game night into a celebration of gothic style and Disney nostalgia. Whether you’re a trivia expert or just love the movie, a Nightmare Before Christmas game night is the perfect way for families to bond over their shared love of spooky fun. 🎃🖤
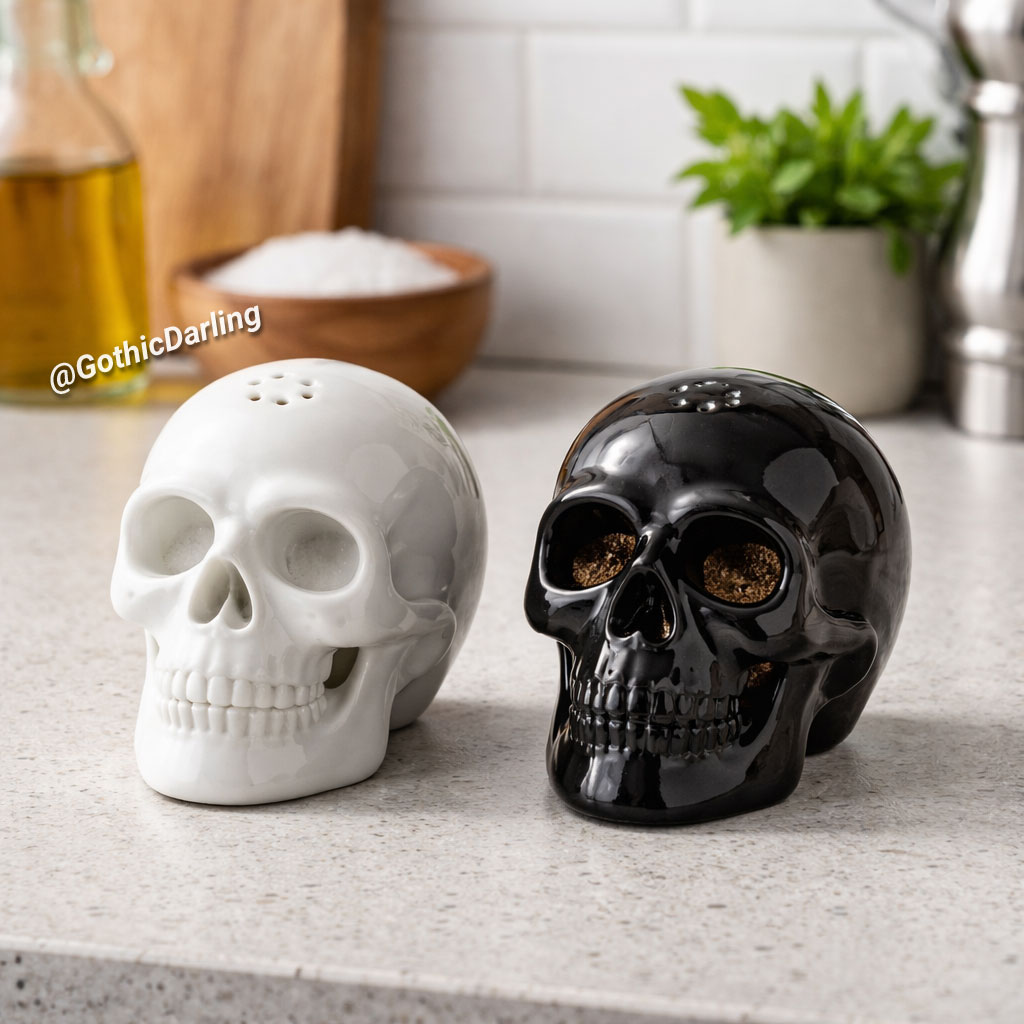
Skull-shaped salt and pepper shakers bring a bold, playful edge to the dining table, blending gothic aesthetics with everyday function. Crafted from ceramic, glass, or resin, these miniature skulls are typically detailed with realistic contours—defined cheekbones, hollow nasal cavities, and etched teeth that double as textured design accents. One skull is finished in a clean white glaze to represent salt, its bright tone reinforcing the classic association with purity and simplicity. The other is coated in a deep matte or glossy black to signify pepper, creating a striking visual contrast when the pair sits side by side.
The white skull shaker for salt often features subtle detailing that stands out against its pale surface, such as faint crackle glazing or lightly shadowed crevices to emphasize dimension. Its perforations are neatly placed at the crown, allowing the salt to pour evenly while maintaining the smooth silhouette of the skull. In contrast, the black skull pepper shaker makes a dramatic statement, its dark finish highlighting sculpted features through reflected light and shadow. Together, the duo creates a balanced set—minimal in color palette yet rich in personality—ideal for Halloween gatherings, themed dinner parties, or year-round décor for those who appreciate macabre design.
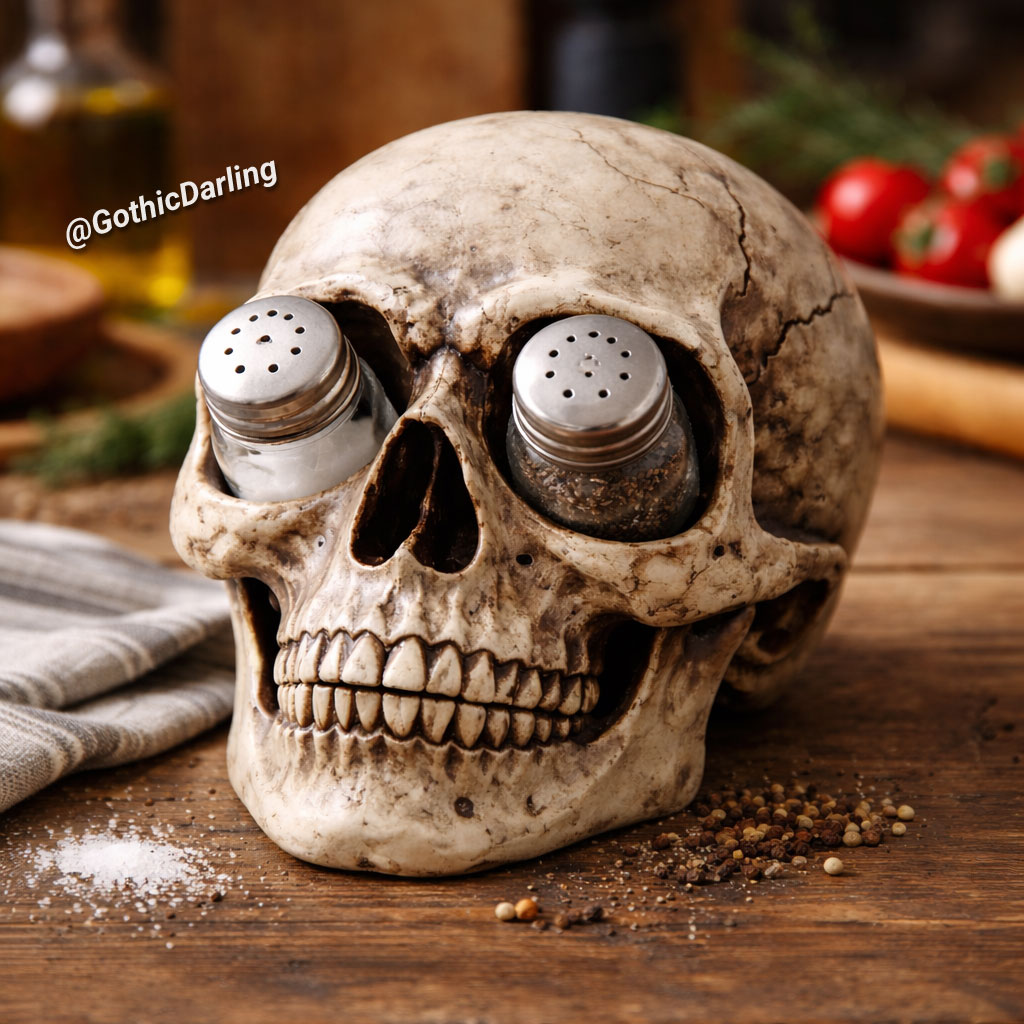
Completing the set is a larger skull sculpture designed to hold the salt and pepper shakers within its eye sockets. This centerpiece skull, often more intricately carved, acts as both storage and display. The hollowed eyes are precisely sized so each smaller skull fits snugly inside, giving the illusion that the larger skull is “watching” through them. When the shakers are removed, the empty sockets add a theatrical flair; when returned, the full composition resembles a cohesive art piece. The result is a functional yet sculptural table accessory that transforms simple seasoning into a conversation-starting ritual.
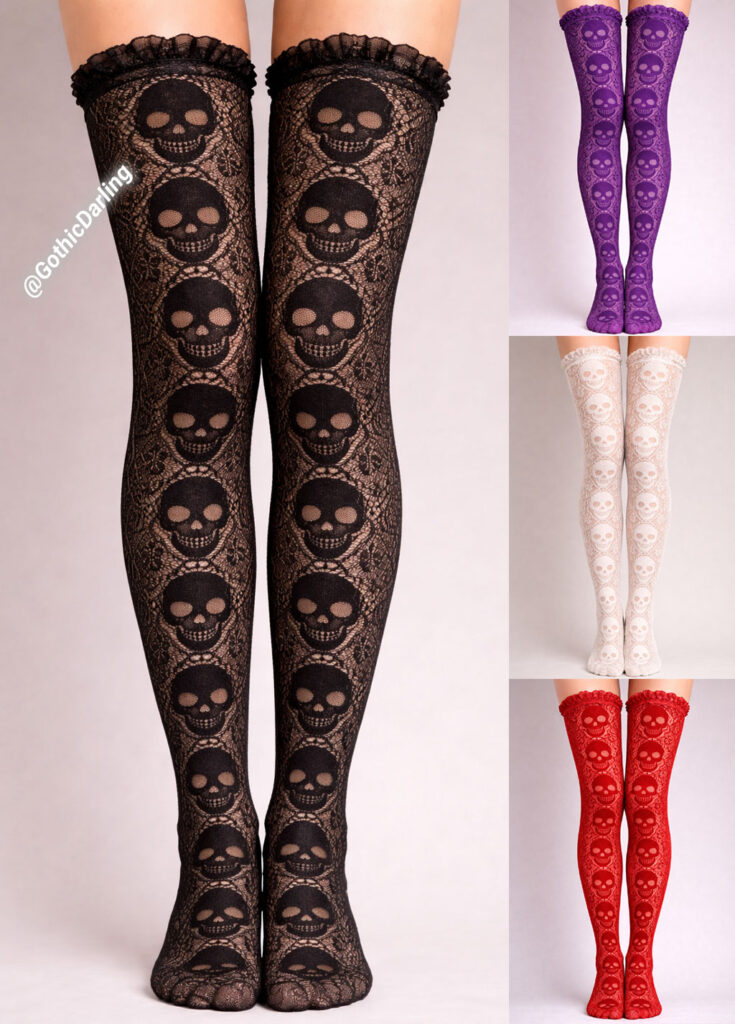
Gothic skull stockings are where elegance meets edge. Delicate lace patterns wind their way down the legs, forming haunting skull motifs that feel both romantic and rebellious. These stockings are not just accessories—they are statements, designed for those who love beauty with a dark soul.
Black skull lace stockings are timeless and dramatic, perfect for classic gothic looks, Victorian-inspired outfits, or all-black ensembles. The skulls seem to emerge from the shadows, subtle yet powerful.
White skull stockings flip expectations. Against pale lace, the skulls feel ghostly and ethereal, giving a soft gothic contrast that pairs beautifully with dark dresses, corsets, or layered looks.
Purple skull lace stockings add a mystical edge. Purple has long been associated with magic, royalty, and the unknown, making these stockings ideal for witchy aesthetics and fantasy-inspired gothic fashion.
Red skull stockings are bold and passionate. Crimson lace evokes themes of love, danger, and dark romance, making them perfect for statement outfits, gothic date nights, or dramatic stage looks.
Lace That Tells a Story
The beauty of skull stockings lies in the lacework itself. Fine, intricate patterns trail down the legs, with skulls woven seamlessly into floral or baroque designs. From afar, they look like classic lace stockings—but up close, the skulls reveal their hidden attitude. It’s gothic fashion with a secret, meant to be noticed by those who truly look.
How to Style Them
Skull lace stockings pair effortlessly with gothic dresses, platform boots, Mary Janes, or heels. Wear them with ripped skirts for a punk-goth edge, or under flowing velvet for a romantic, old-world feel. They also shine layered under shorts or mini skirts, letting the skull patterns become the focal point.
More Than Fashion
These stockings celebrate individuality. They blend softness and darkness, tradition and rebellion, beauty and bone. Whether in black, white, purple, or red, gothic skull stockings let you wear your dark aesthetic proudly—one lace-covered step at a time.
Glow-in-the-dark acrylic skull nails bring a thrilling mix of bold color and Gothic charm to your manicure, especially when they come in a full rainbow variety of vibrant shades like blue, green, purple, orange, and red. Each nail becomes its own tiny piece of art, with luminous skull designs that shine brilliantly in the dark.
Under regular lighting, the colors pop with a striking, edgy beauty—but once the lights go down, the skulls glow with an eerie neon radiance that transforms your nails into a spooky rainbow light show.
Here are my glow skull nail concept design to show not for sale.
The spectrum of colors adds a playful twist to classic Gothic nail aesthetics. Instead of sticking to traditional black-and-white designs, these nails celebrate the darker side of the rainbow. The glowing skulls appear almost enchanted, like little spectral charms glowing from another world. Whether you’re going for a colorful goth look, a cosmic vibe, or something perfect for spooky season, the layered textures and glowing accents make this nail design unforgettable.
Glow-in-the-dark rainbow skull nails are perfect for selfies, parties, concerts, Halloween events, and everyday wear for those who adore standing out. They bring together everything people love about Gothic style—mystery, edge, and supernatural flair—with the added joy of bright, magical color. With each flicker of light, your nails look alive, glowing like neon charms from your own personal haunted rainbow.
Celebrate spooky season all year long with this enchanting “Waiting for Halloween” tote bag featuring original gothic artwork by New Orleans artist Monique Lula.
“Waiting for Halloween” Gothic Art Tote Bag – Exclusive Design by Monique Lula
This exclusive design captures the hauntingly beautiful moment of a goth girl quietly waiting by her window in a moonlit castle, surrounded by fluttering black bats and soft celestial glow. It’s the perfect mood for anyone who counts down the days until their favorite holiday.
Crafted to be both stylish and durable, this tote bag is ideal for everyday use—whether you’re strolling through the French Quarter, shopping at the farmer’s market, or packing your essentials for a haunted adventure. The detailed artwork is printed in vivid, long-lasting color, bringing Monique’s signature gothic charm everywhere you go.
✨ Features:
Exclusive “Waiting for Halloween” artwork by Monique Lula
Gothic scene featuring a moonlit castle window, dreamy bats, and a wistful goth girl
High-quality, durable fabric perfect for daily use
Crisp, vibrant print that won’t fade
Comfortable shoulder straps
Spacious interior for books, groceries, crystals, or spooky treasures
Perfect gift for Halloween lovers, goth girls, and fans of dark whimsical art
Gothic plushies are having a moment — and honestly, it was only a matter of time. In a world where cute meets creepy, these soft little shadow-creatures have captured hearts across social media, collector groups, and alternative fashion communities. Plush toys are no longer just for kids; they’ve become emotional comfort objects, aesthetic décor pieces, and mini mascots for anyone who loves a touch of darkness with their sweetness.
From haunted bedrooms to goth-themed nurseries, spooky plushies are everywhere — and they’re selling out faster than ever. Fans love them because they’re expressive, unique, and perfect for showing personality without saying a word. Whether perched on a bookshelf, riding shotgun in the car, or starring in a moody Instagram photoshoot, gothic plushies bring a soft, magical mood into any space.
Meet some of my Gothic Plushie friends
For now, let’s take a peek at some of the newest gothic plush designs I posted on social media:
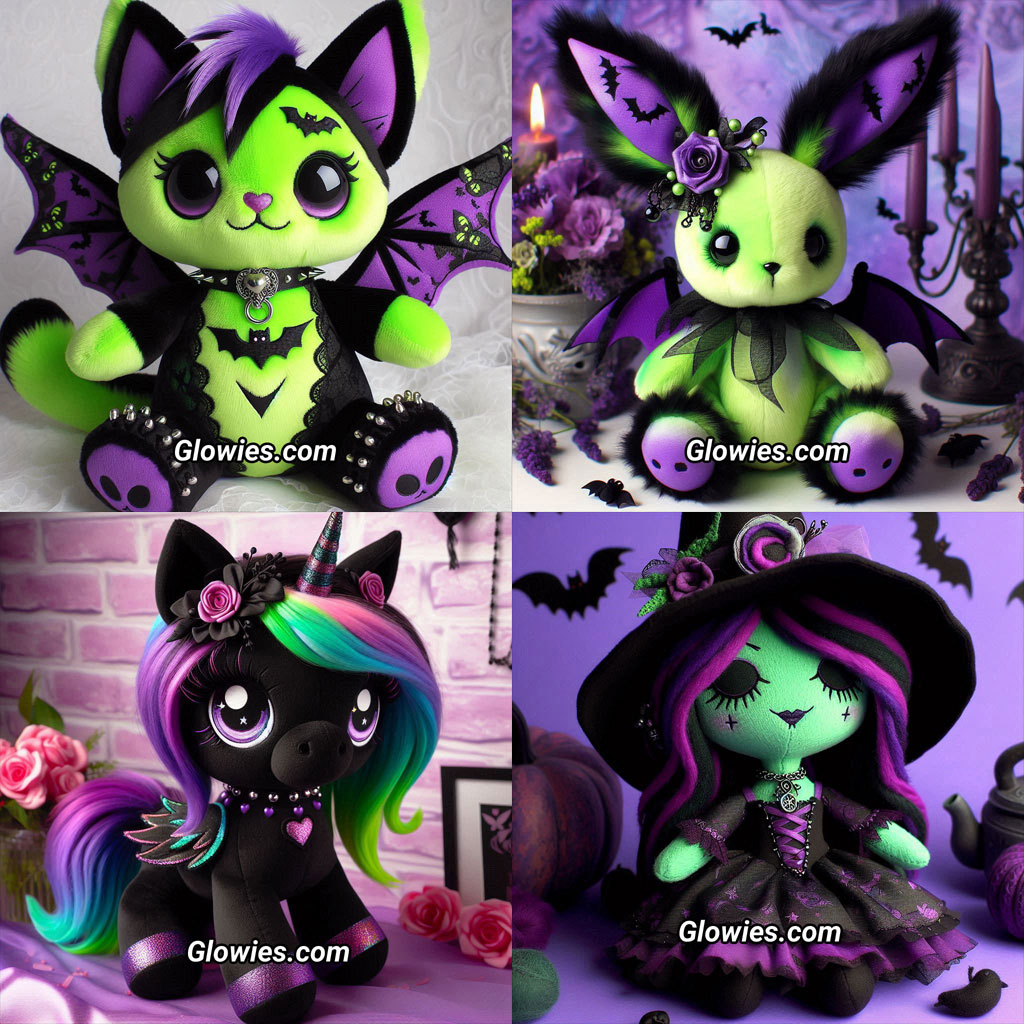
💚 The Green Cat with Purple Bat Wings
Mischievous, mystical, and a little bit supernatural, this green kitty looks like it wandered out of a moonlit portal. Its purple bat wings give it that perfect gothic-fantasy edge — cute but powerful, strange but adorable.
💚 The Green Bunny Rabbit with Purple Bat Wings
A perfect companion to the cat, this bunny blends forest-spirit energy with pastel-goth charm. The bright green fur contrasts beautifully with the dark wings, making this plush feel like a creature from an enchanted, spooky meadow.
🖤 The Black Unicorn Pony with Rainbow Hair
Every goth still loves rainbows — especially when they glow like magic against obsidian fur. This unicorn mixes dark fantasy with a splash of color, creating a plush that feels joyful and mysterious. It’s part gothic guardian, part dreamy comfort creature.
💚 The Witchy Green Plush with a Black Witch Hat
This green witch plush is tiny, charming, and full of personality. With her little black hat and enchanting expression, she’s the perfect pocket-sized familiar for Halloween lovers and witchy aesthetics all year long.
Why Gothic Plushies Are Becoming So Popular
Goth-inspired collectibles have skyrocketed, but plushies hold a special place because they’re:
Soft and comforting while still matching a dark aesthetic
Perfect for décor, especially gothic bedrooms, haunted nurseries, and witchy studios
Cute without being overly cutesy, making them great for grown-ups
Highly giftable — especially around Halloween, Christmas, Valentine’s, and birthdays
Unique, often made in small batches or limited runs
Collectors love pieces that feel personal, handmade, meaningful — and gothic plushies fit that desire beautifully.
A Peek Into What’s Coming Next
Many people don’t realize this, but I also sew, and I’ve been quietly planning an entirely new series of handmade gothic dolls. This is a future project that’s already brewing in my studio — think stitched personalities, soft sculpted faces, glow-in-the-dark accents, bat wings, tiny outfits, and a full cast of characters from the world of Glowies.
While those dolls are still in development, these gothic plushies are the first wave — a playful preview of the spooky-cute universe I’m building.
Final Thoughts
Gothic plushies are more than just toys — they’re emotional companions, aesthetic art pieces, and collectible characters with personality and charm. As the gothic and alternative style community continues to grow, these little creatures shine as symbols of comfort, creativity, and a love for the spooky side of life.
Whether you’re a longtime gothic darling or new to the dark-cute aesthetic, these plushies bring soft magic into your world… one stitched smile at a time.
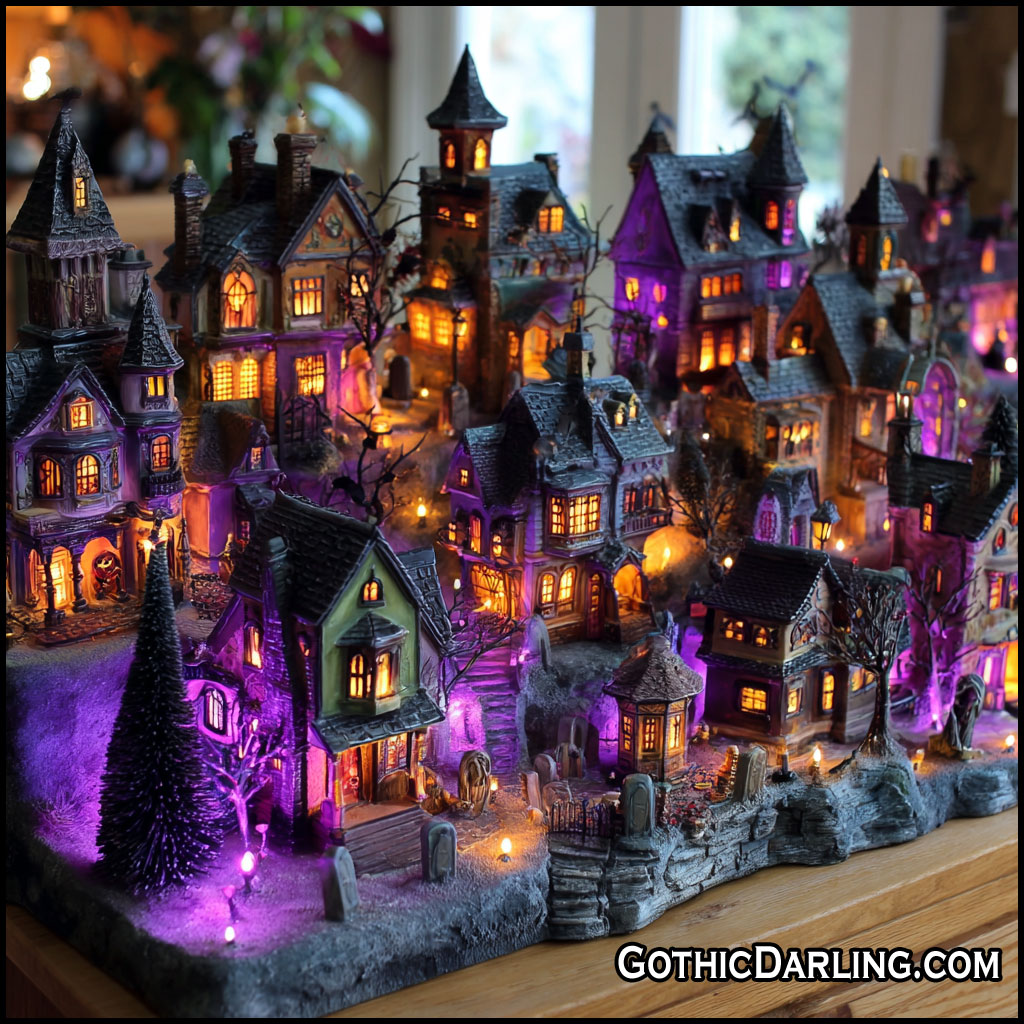
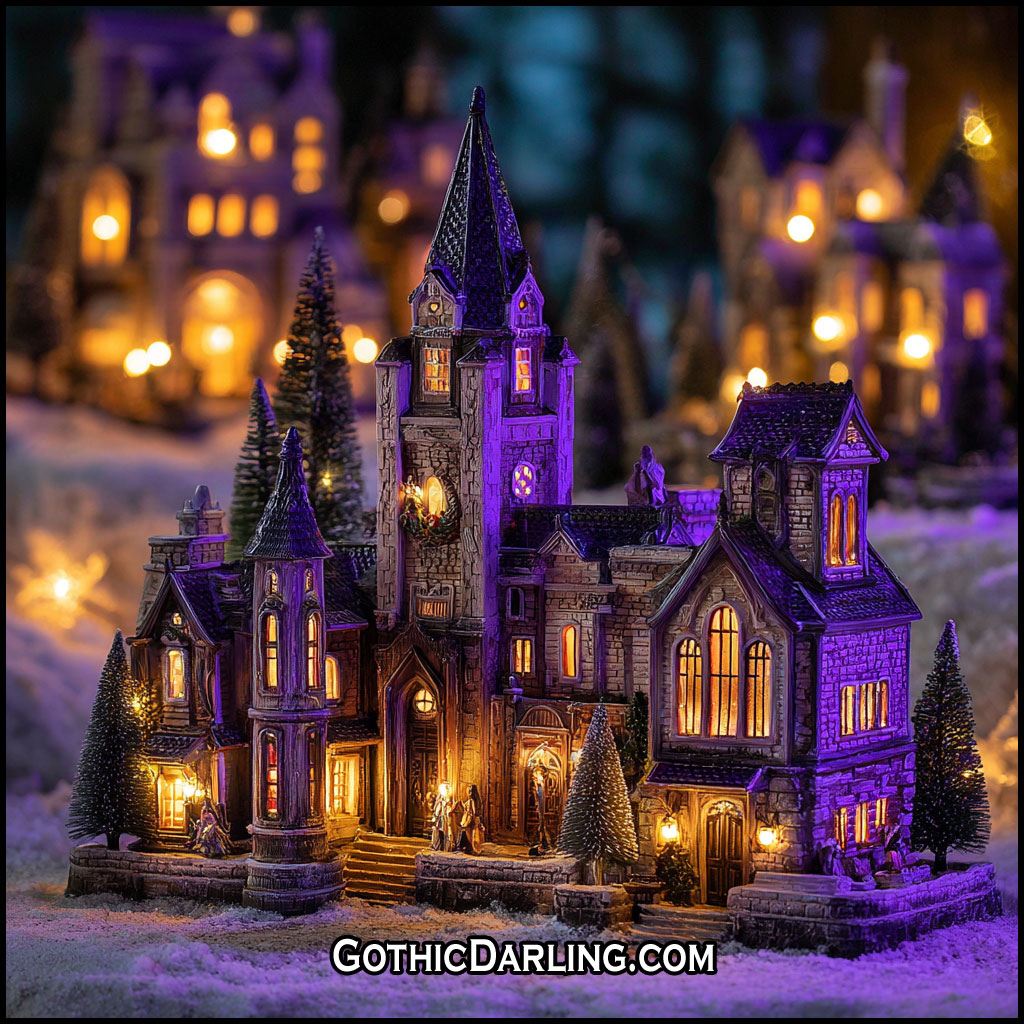
If you love both Halloween and Christmas, why not combine them into one enchanting tabletop display? A Halloween Christmas Village blends spooky charm with cozy holiday lights — think cobweb-covered lamp posts, black Christmas trees dusted with glitter “snow,” and ceramic houses glowing in orange, purple, and green hues. Here’s everything you need to build your own miniature Gothic town this season.
🎃🕯️ Intro: The Magic of a Halloween Christmas Village
There’s something irresistibly enchanting about the warm glow of a Christmas village — those tiny ceramic houses, lampposts, and snow-dusted trees that bring a touch of nostalgia to the holidays. But what if you gave that cozy winter wonderland a delightfully spooky twist? A Halloween Christmas Village is the perfect way to merge your love for eerie autumn vibes and festive holiday cheer, creating a tabletop display that feels straight out of a Tim Burton dream.
Imagine a Gothic town square where witches string black garlands around street lamps, bats circle above frosted rooftops, and glowing pumpkins replace traditional red and green décor. It’s an otherworldly blend of Halloween’s mystery and Christmas’s warmth — a fusion that feels both magical and mischievous. Whether you’re a collector of ceramic houses, a crafter who loves DIY details, or simply someone who wants to make your holiday display stand out, this guide will help you build the ultimate Gothic Holiday Village right at home.
🏙️ The Core Buildings of Your Gothic Village
Every Christmas village needs a few key landmarks to feel like a real town — even a haunted one. Here are some must-have structures to anchor your display:
Town Hall or Gothic Courthouse – The centerpiece of your spooky town, with tall windows, black trim, and flickering LED lights.
The Bank of Shadows – A classic bank building with stone columns, gargoyle statues, and eerie lighting inside.
The Haunted Hotel – Essential for that eerie “Nightmare Before Christmas” vibe. Add flickering lights in the windows for a ghostly glow.
The Witch’s Laboratory or Alchemist’s Workshop – Replace Santa’s toy shop with a mad scientist’s lab full of bubbling potions.
The Pumpkin Bakery or Candy Shoppe – A cozy counterpoint to the spookiness, glowing in warm amber tones and “selling” pumpkin pastries or candy skulls.
The Cemetery Chapel or Mausoleum – A tiny Gothic church surrounded by miniature gravestones, perfect for dramatic lighting.
Tip: Mix ceramic Halloween village buildings with classic Christmas ones. Paint them in dark metallics, purples, blacks, and silvers to match your theme.
🌲 Trees, Foliage, and Scenery
One of my favorite parts of creating the village is all the little trees and tombstones and stuff you can fit just about anywhere in your design. Your landscape ties everything together. Use:
Black or dark green miniature Christmas trees – Flocked with “snow” (white glitter or faux frost spray).
Orange, purple, and green LED trees – These give a soft eerie glow that feels both festive and mysterious.
Creepy accessories – Tiny jack-o’-lanterns, bats, spider webs, and tombstones tucked between trees.
Artificial moss, snow blankets, and black felt – Layer these to create paths, graveyard grounds, or foggy areas.
Tip: Mix materials with different textures — velvet snowcloth next to rough moss looks stunning under fairy lights.
🕯️ Lighting the Village
Get creative with all the little street lamps and village parts that make up the lighting of your town. Lighting is the secret to making your village feel alive.
Use a mix of:
Battery-operated LED tea lights inside each house.
Fairy light strands in purple, orange, or warm white for rooftops and trees.
Spotlights or blacklights behind key buildings for dramatic effect.
Flicker bulbs in lampposts for an old-world, candle-lit atmosphere.
Tip: Arrange your figures in little scenes — a witch hanging ornaments on a black Christmas tree, or a vampire sipping cocoa near the firepit.
🪄 Display and Arrangement Tips
Start with your largest building (like the Gothic Hotel or Town Hall) at the back.
Create elevation using small risers, boxes, or wood pieces draped in fabric for a layered look.
Cluster related buildings together — shops on one side, cemetery and lab on another.
Hide lighting batteries and wires under cloth, moss, or “snow.”
Photograph it! A Halloween Christmas Village looks amazing under dim lighting with candles glowing in the background.
🛍️ What You’ll Need
Buildings:
Haunted Hotel
Gothic Town Hall
Bank or Apothecary
Pumpkin Bakery or Candy Shoppe
Witch’s Laboratory
Cemetery Chapel or Mausoleum
Accessories:
Mini black and orange trees
Moss, cotton “fog,” or fake snow
Figurines (witches, skeletons, cats, ghosts)
Street lamps, fences, benches
LED tea lights, fairy lights, or blacklights
Tools & Supplies:
Extension cords or battery packs
Small risers or boxes for height
Paint (black, silver, purple) for touch-ups
Hot glue or museum putty for securing pieces
🎁 Final Touch: The Gothic Christmas Spirit
Your Halloween Christmas Village is more than a decoration — it’s a storybook town where two magical worlds meet. With glowing pumpkins beside snowy rooftops and spectral lights flickering through frosted windows, your village will capture the mysterious beauty of both holidays.
So light the candles, cue the eerie carols, and welcome visitors to your Gothic Holiday Village of Dreams.
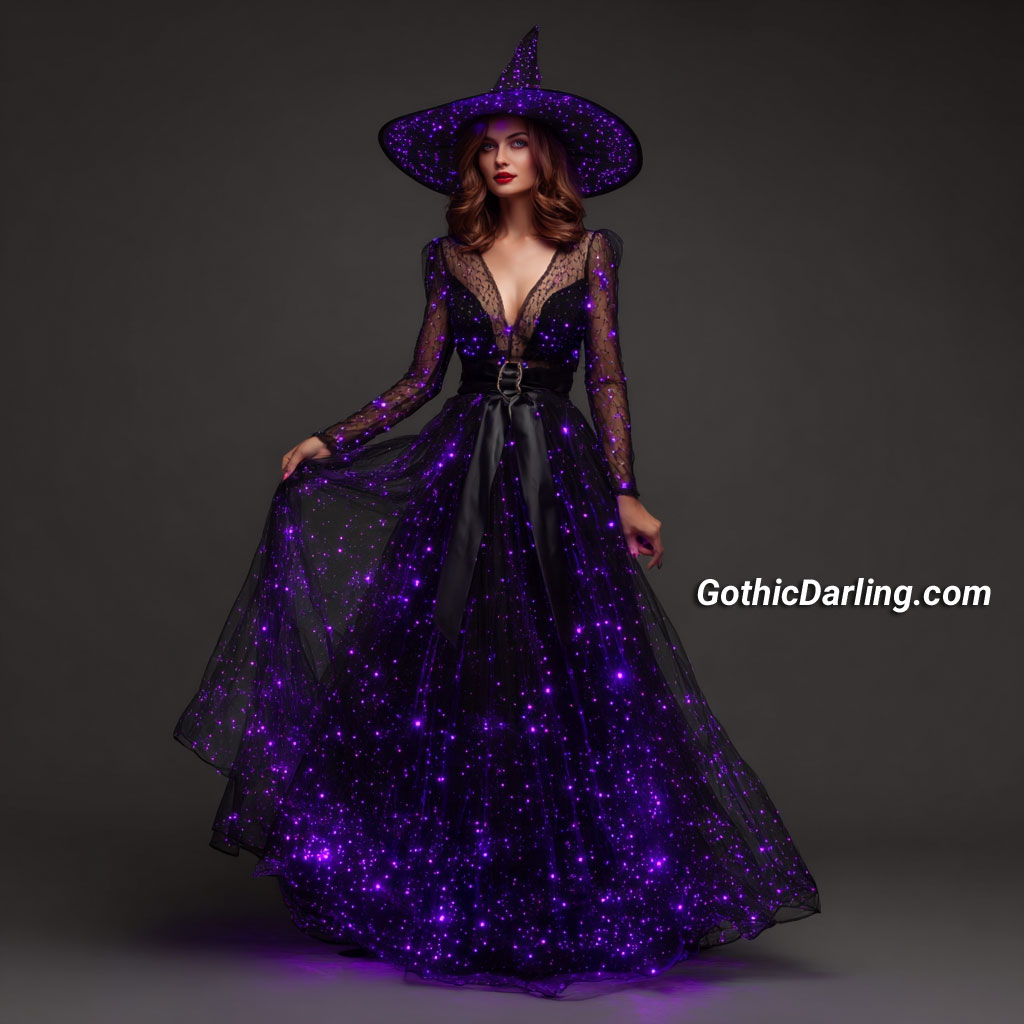
✨ Every day can be Halloween when you’ve got a light-up dress that glows with purple LED light! 🖤 This isn’t just a costume—it’s a whole mood. When the lights go down, the soft violet glow wraps around you like a gothic fairy tale. Perfect for haunted house parties, moonlit walks, or just adding a little witchy sparkle to your everyday look.
💜 The best part? These dresses come in all colors and styles—lacey, velvet, tulle, or sleek satin—so you can channel your inner vampire queen, cyber witch, or ethereal dark fairy. Whether you’re stepping out for Halloween night or just want to turn heads at your favorite café, you’ll shimmer like midnight magic.
🕯️ I wear mine year-round because why should the spooky glow fade after October? Every flicker of purple light reminds me that the gothic spirit lives in every season. It’s not just a costume—it’s confidence, creativity, and a touch of rebellion stitched into fabric and light. 🌙✨
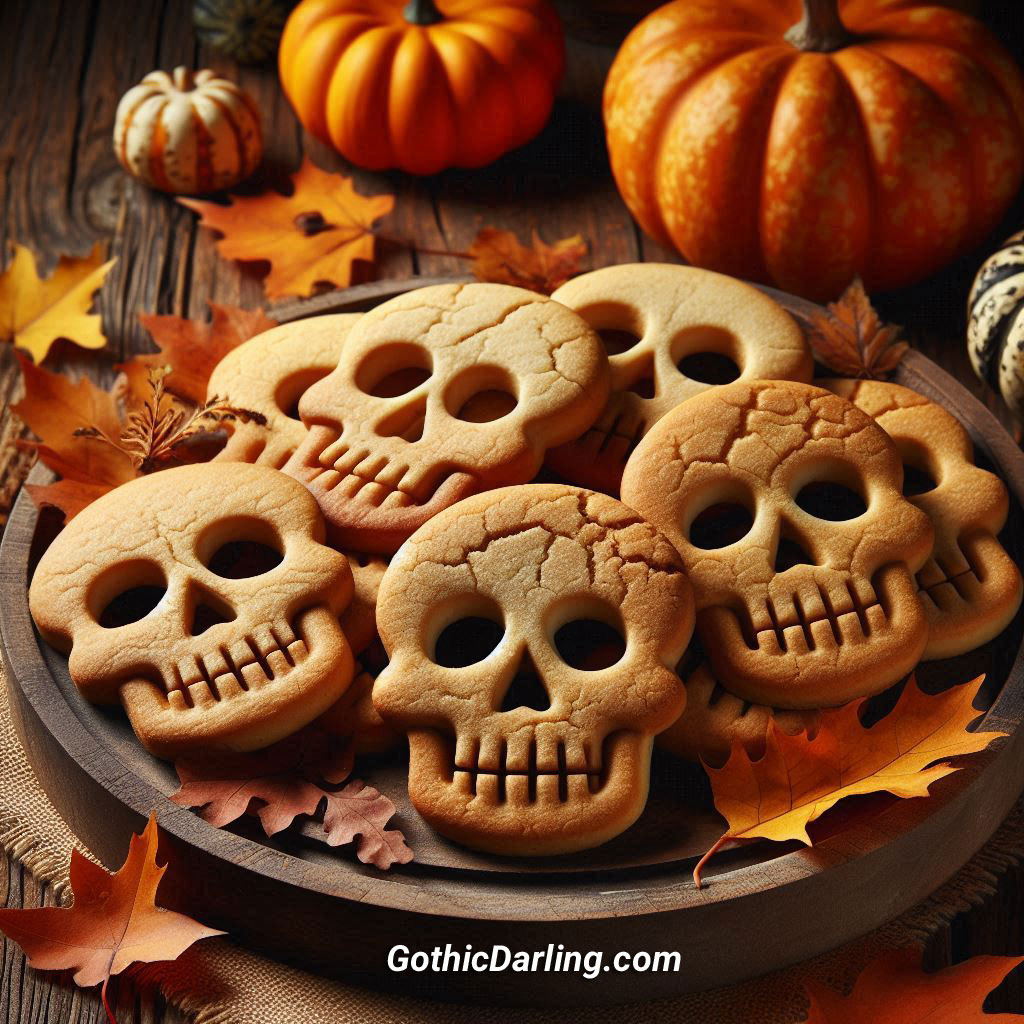
If you’re anything like me, you know Halloween isn’t just a day — it’s a lifestyle. And what better way to celebrate your spooky spirit year-round than with skull-shaped cookies?
These eerie yet adorable treats are the perfect blend of creepy and sweet — ideal for a gothic party, scary movie night, or as part of your Halloween dessert table. Imagine a tray of shiny black, ghostly white, or blood-red skull cookies glowing under candlelight — it’s the perfect mix of macabre and delicious.
🦇 What You’ll Need
Before we begin, let’s gather your spooky supplies:
Or cookie cutters #ad (depending on your style preference)
Mixing bowls and a whisk or electric mixer
Rubber spatula for scraping the batter
Baking sheet (if using cutters)
Cooking spray or butter (for greasing molds)
Piping bag (optional for detail work)
Black or white icing, food coloring, or edible shimmer dust for decorating
🍫 Basic Skull Cookie Recipe
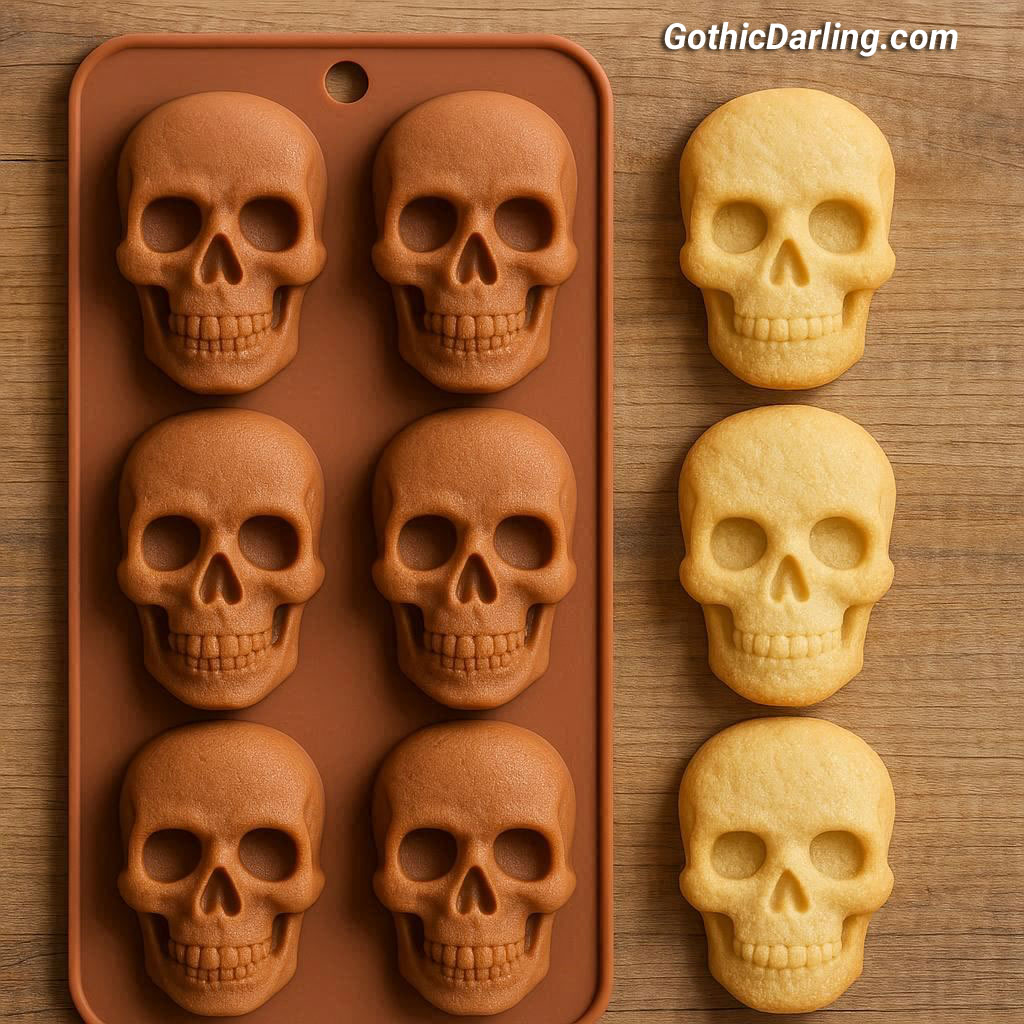
Here’s a simple and delicious cookie recipe perfect for pouring or pressing into your skull molds.
Ingredients:
2 ½ cups all-purpose flour
½ teaspoon baking powder
¼ teaspoon salt
¾ cup unsalted butter, softened
1 cup granulated sugar
1 large egg
1 teaspoon vanilla extract (or almond extract for a mysterious twist)
Optional: 2 tablespoons cocoa powder for chocolate skulls or black food coloring for a darker gothic look
Instructions:
Preheat your oven to 350°F (175°C).
In a bowl, whisk together the flour, baking powder, and salt.
In another bowl, cream the butter and sugar together until light and fluffy. Add the egg and vanilla extract.
Gradually add your dry ingredients into the wet mixture until a soft dough forms.
If using skull molds, lightly grease them with butter or cooking spray, then press the dough evenly into each cavity. If using cookie cutters, roll out the dough to about ¼-inch thickness and cut out your skull shapes.
Bake for 8–10 minutes, or until the edges start to turn golden. Let cool completely before removing from the molds.
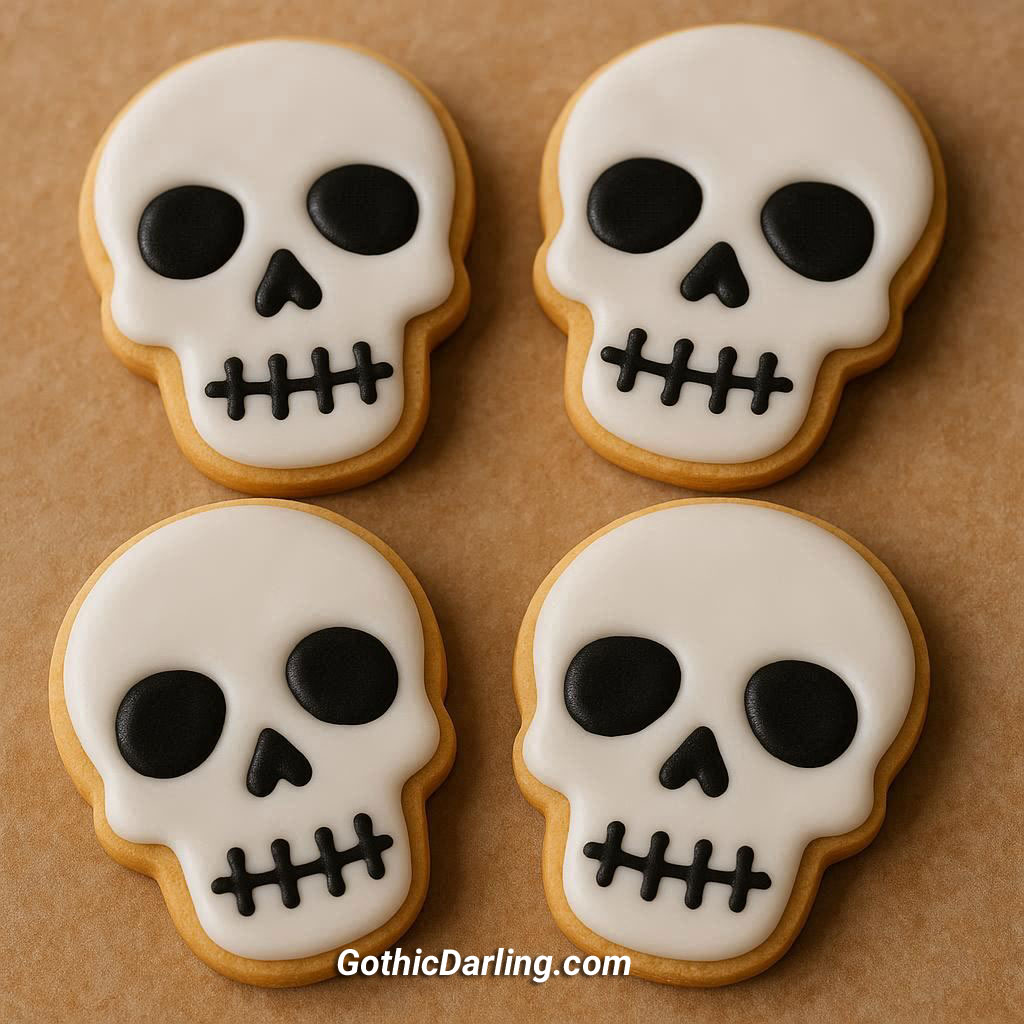
🖤 Decorating Your Gothic Cookies
Now comes the fun part — giving your skulls their spooky personalities! Use black icing, black glaze, or white chocolate drizzle to highlight the eyes, nose, and teeth. You can even dust them with edible silver shimmer or glow-in-the-dark (UV-reactive) edible powder for a truly haunting glow under blacklight.
Whether you make them cute or creepy, your Skull-Shaped Cookies will be the star of any gothic gathering. Pair them with a mug of pumpkin spice coffee or dark cocoa, light a few candles, and enjoy your spooky masterpiece. Because at Gothic Darling, we believe that every day deserves a touch of the darkly delightful. 🖤✨